
1. សេចក្តីផ្តើម
This manual provides essential information for the safe and efficient use of your Lexmark E260D Monochrome Laser Printer. Please read these instructions carefully before operating the device and retain them for future reference. The Lexmark E260D is designed for fast, high-quality black and white document printing, featuring automatic two-sided printing for efficiency.
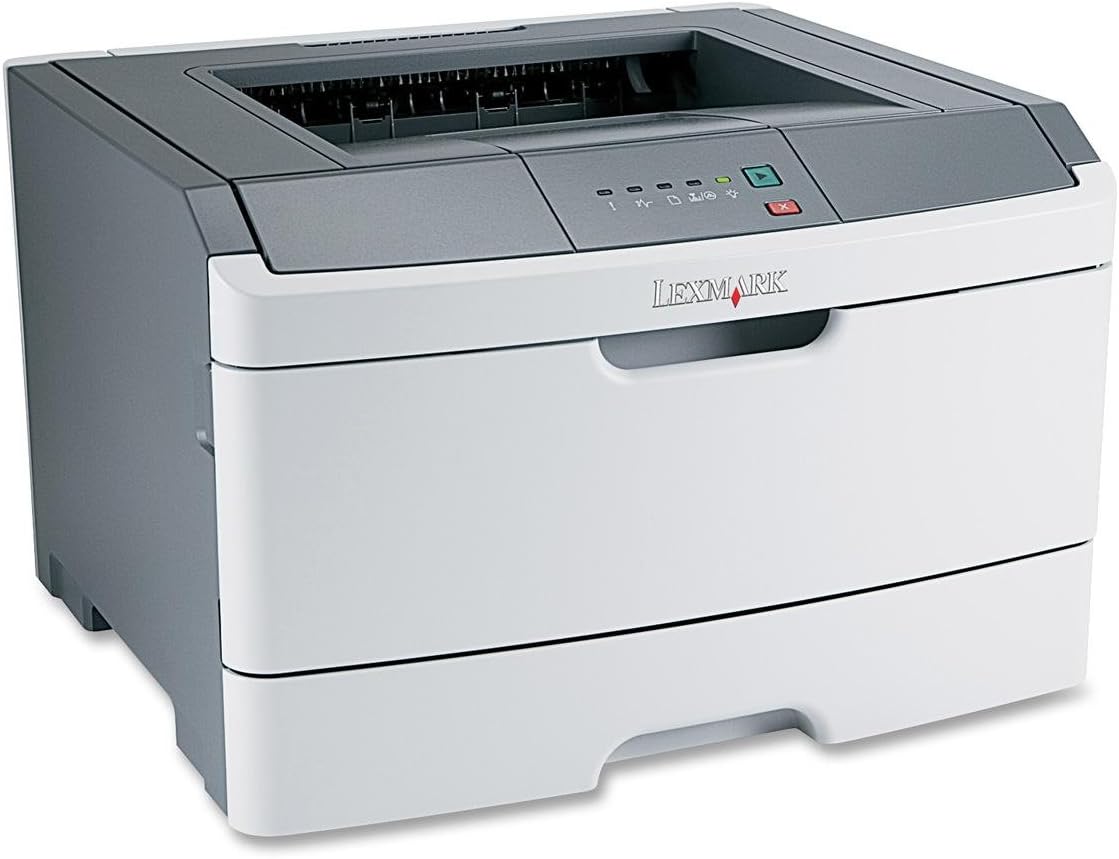
រូបភាពទី 1៖ Lexmark E260D Monochrome Laser Printer. This image shows the printer from a front-right angle, highlighting its compact design with a white body and a dark gray top cover. The output tray is visible on top, and the Lexmark logo is displayed on the front panel above the paper input tray.
2. ព័ត៌មានសុវត្ថិភាព
- ភ្ជាប់ម៉ាស៊ីនបោះពុម្ពទៅនឹងព្រីភ្លើងដែលមានមូលដ្ឋានជានិច្ច។
- កុំរារាំងការបើកខ្យល់។
- ទុកម៉ាស៊ីនបោះពុម្ពឱ្យឆ្ងាយពីទឹក ឬសំណើមលើស។
- ប្រើតែខ្សែភ្លើង និងគ្រឿងបន្ថែមដែលបានកំណត់ប៉ុណ្ណោះ។
- Avoid touching the fuser area, as it can be hot.
3. មាតិកាកញ្ចប់
ផ្ទៀងផ្ទាត់ថាធាតុទាំងអស់មាននៅក្នុងកញ្ចប់៖
- Lexmark E260D Monochrome Laser Printer
- ខ្សែថាមពល
- Starter Toner Cartridge (may vary by region)
- Setup Guide or Documentation
- ខ្សែ USB (អាចត្រូវបានលក់ដាច់ដោយឡែក)
4. រៀបចំ
4.1 ការវេចខ្ចប់ម៉ាស៊ីនបោះពុម្ព
- យកម៉ាស៊ីនបោះពុម្ពចេញពីវេចខ្ចប់របស់វា។
- យកសម្ភារៈវេចខ្ចប់ កាសែត និងខ្សែភាពយន្តការពារទាំងអស់ចេញពីផ្នែកខាងក្រៅ និងខាងក្នុងនៃម៉ាស៊ីនបោះពុម្ព។
- ដាក់ម៉ាស៊ីនបោះពុម្ពលើផ្ទៃដែលមានស្ថេរភាព និងមានខ្យល់ចេញចូលគ្រប់គ្រាន់។
4.2 ការភ្ជាប់ម៉ាស៊ីនបោះពុម្ព
- ភ្ជាប់ខ្សែថាមពលទៅនឹងម៉ាស៊ីនបោះពុម្ព ហើយបន្ទាប់មកទៅព្រីអគ្គិសនីដែលមានដី។
- ភ្ជាប់ចុងម្ខាងនៃខ្សែ USB ទៅនឹងរន្ធ USB របស់ម៉ាស៊ីនបោះពុម្ព និងចុងម្ខាងទៀតទៅនឹងកុំព្យូទ័ររបស់អ្នក។
4.3 ការដំឡើង Toner Cartridge
- បើកទ្វារចូលខាងមុខរបស់ម៉ាស៊ីនបោះពុម្ព។
- Carefully remove the toner cartridge from its packaging and shake it gently to distribute the toner.
- បញ្ចូលព្រីនធ័រទៅក្នុងម៉ាស៊ីនបោះពុម្ពរហូតទាល់តែវាចុចចូលកន្លែង។
- Close the front access door securely.
៣ កំពុងផ្ទុកក្រដាស
- ទាញថាសក្រដាសចេញ។
- កែសម្រួលមគ្គុទ្ទេសក៍ក្រដាសដើម្បីផ្គូផ្គងទំហំក្រដាសដែលអ្នកកំពុងផ្ទុក។
- ផ្ទុកក្រដាសទៅក្នុងថាស ដោយធានាថាវារាបស្មើ និងមិនលើសពីបន្ទាត់បំពេញអតិបរមា។
- Push the paper tray back into the printer until it locks.
4.5 ការដំឡើងកម្មវិធីបញ្ជា
After connecting the printer, your operating system may automatically detect and install the necessary drivers. If not, follow these steps:
- Insert the driver CD (if included) into your computer's CD/DVD drive, or download the latest drivers from the official Lexmark support webគេហទំព័រ។
- អនុវត្តតាមការណែនាំនៅលើអេក្រង់ ដើម្បីបញ្ចប់ការដំឡើងកម្មវិធីបញ្ជា។
- ចាប់ផ្ដើមកុំព្យូទ័ររបស់អ្នកឡើងវិញ ប្រសិនបើត្រូវបានសួរ។
5. ដំណើរការម៉ាស៊ីនបោះពុម្ព
5.1 ការបោះពុម្ពមូលដ្ឋាន
- ត្រូវប្រាកដថាម៉ាស៊ីនបោះពុម្ពត្រូវបានបើក និងភ្ជាប់ទៅកុំព្យូទ័ររបស់អ្នក។
- បើកឯកសារដែលអ្នកចង់បោះពុម្ពនៅលើកុំព្យូទ័ររបស់អ្នក។
- ជ្រើសរើស File > បោះពុម្ព (ឬពាក្យបញ្ជាសមមូលនៅក្នុងកម្មវិធីរបស់អ្នក)។
- Choose the Lexmark E260D from the list of available printers.
- Adjust print settings as needed (e.g., number of copies, page range).
- ចុច បោះពុម្ព.
5.2 Duplex Printing (Two-Sided)
The Lexmark E260D supports automatic two-sided printing.
- នៅពេលផ្ញើការងារបោះពុម្ព សូមចូលប្រើលក្ខណសម្បត្តិ ឬចំណូលចិត្តរបស់ម៉ាស៊ីនបោះពុម្ព។
- ស្វែងរកជម្រើសដែលទាក់ទងនឹង ការបោះពុម្ពពីរជាន់ or បោះពុម្ពទាំងសងខាង.
- Select the desired duplex option (e.g., long-edge binding, short-edge binding).
- បញ្ជាក់ការកំណត់របស់អ្នក ហើយចុច បោះពុម្ព.
6. ការថែទាំ
6.1 ការសម្អាតម៉ាស៊ីនបោះពុម្ព
- ខាងក្រៅ៖ ជូតផ្ទៃខាងក្រៅដោយទន់ ឃamp, ក្រណាត់គ្មានជាតិសរសៃ។ កុំប្រើសារធាតុសម្អាត ឬសារធាតុរំលាយ។
- ផ្នែកខាងក្នុង៖ Periodically open the front access door and gently remove any loose toner dust with a dry, lint-free cloth. Avoid touching sensitive components.
6.2 ការជំនួសធុងទឹកថ្នាំ
When the toner level is low, the printer's control panel will indicate it. Replace the toner cartridge as follows:
- ត្រូវប្រាកដថាម៉ាស៊ីនបោះពុម្ពត្រូវបានបើក។
- បើកទ្វារចូលខាងមុខ។
- យកព្រីនធ័រចាស់ចេញដោយប្រុងប្រយ័ត្ន ដោយទាញវាចេញត្រង់។
- Unpack the new Lexmark E260D compatible toner cartridge and shake it gently.
- បញ្ចូលប្រអប់ព្រីនថ្មីទៅក្នុងម៉ាស៊ីនបោះពុម្ពរហូតទាល់តែវាចាក់សោ។
- បិទទ្វារចូលខាងមុខ។
7. ការដោះស្រាយបញ្ហា
7.1 ក្រដាសបិទ
If a paper jam occurs, the printer's control panel will display an error. Follow these general steps:
- Turn off the printer and unplug it from the power outlet.
- Open all accessible covers (front door, rear door, etc.).
- Carefully remove any jammed paper, pulling it in the direction of the paper path to avoid tearing.
- Close all covers securely.
- ដោតចូល ហើយបើកម៉ាស៊ីនបោះពុម្ព។
7.2 បញ្ហាគុណភាពបោះពុម្ព
- ស្នាមបោះពុម្ពស្រអាប់ ឬស្រាល៖ The toner cartridge may be low. Try shaking the cartridge gently or replace it.
- ស្នាមឆ្នូតៗ ឬ ស្នាមប្រេះ៖ Clean the interior of the printer, especially around the toner cartridge area. Ensure the paper type setting matches the loaded paper.
- ទំព័រទទេ៖ Ensure the toner cartridge is properly installed and has toner. Check printer drivers and print settings.
7.3 បញ្ហានៃការតភ្ជាប់
- រកមិនឃើញម៉ាស៊ីនបោះពុម្ព៖ Ensure the USB cable is securely connected to both the printer and the computer. Try a different USB port or cable. Reinstall printer drivers if necessary.
- Print Jobs Stuck: Clear the print queue on your computer. Restart both the printer and the computer.
7.4 Envelope Printing on Mac
Users printing envelopes on macOS may encounter issues with incorrect print orientation or partial printing. To resolve this:
- In the print dialogue box, locate the menu that initially reads 'Layout'.
- Select 'Paper Feed' from this menu.
- Change the 'Auto Select' option to 'Manual Envelope'.
- បន្តជាមួយនឹងការបោះពុម្ព។
8. លក្ខណៈបច្ចេកទេស
| លក្ខណៈ | ការបញ្ជាក់ |
|---|---|
| ឈ្មោះម៉ូដែល | E260D |
| បច្ចេកវិទ្យាបោះពុម្ព | ឡាស៊ែរ |
| លទ្ធផលម៉ាស៊ីនបោះពុម្ព | ម៉ូណូក្រូម |
| ល្បឿនបោះពុម្ពអតិបរមា (ម៉ូណូក្រូម) | 35 ppm |
| គុណភាពបោះពុម្ពអតិបរមា (ស និងខ្មៅ) | 1200 dpi |
| ការបោះពុម្ពពីរជាន់ | ស្វ័យប្រវត្តិ |
| បច្ចេកវិទ្យាតភ្ជាប់ | USB 2.0 |
| សមត្ថភាពសន្លឹកបញ្ចូលអតិបរមា | 250 សន្លឹក |
| មេឌៀបោះពុម្ពដែលគាំទ្រ | Envelopes, Labels, Paper (plain), Transparencies |
| សមត្ថភាពផ្ទុកអង្គចងចាំ | 32 មេកាបៃ |
| វិមាត្រផលិតផល | 16.5 x 18.1 x 14 អ៊ីញ |
| ទំងន់ធាតុ | 29.8 ផោន (13.53 គីឡូក្រាម) |
| ការប្រើប្រាស់ថាមពល (ក្នុងរបៀប) | 16 វ៉ាត់ |
9. ព័ត៌មានធានា
The Lexmark E260D Monochrome Laser Printer comes with an Exchange Warranty. For specific terms, conditions, and duration of your warranty, please refer to the warranty documentation included with your product or visit the official Lexmark support webគេហទំព័រ។
៥.៧. ជំនួយអតិថិជន
For further assistance, technical support, or to order replacement parts and supplies, please contact Lexmark Customer Support. You can find contact information and additional resources on the official Lexmark webគេហទំព័រ៖
- ការគាំទ្រ Lexmark Webគេហទំព័រ៖ www.lexmark.com/support (សូមចំណាំ៖ នេះគឺជាកន្លែងដាក់ URL. Refer to your product documentation for the exact support link.)